TLC Mom: diy
Showing posts with label diy. Show all posts

Tuesday, December 30, 2014

Project Planning and List Sheets - free for download
2:39 PM0 Comments
I'm starting a little early when it comes to organizing things. So here's a little sneak peek of what you can expect over next year and perhaps years to come. Who knows, one step at a time right?

Over the past few days I've been designing a project list and planner sheets. These will help Paul and I figure out just what projects we have in mind, our budget for each one and gauge which one's we'd like to tackle first. These can be used for any project you have in mind be it in your home or something crafty.

Downloads Available:
Project List Worksheet: HERE
Project Planner Worksheet: HERE
These worksheets are for personal use ONLY. Not for re-sale.
©TLC Mom

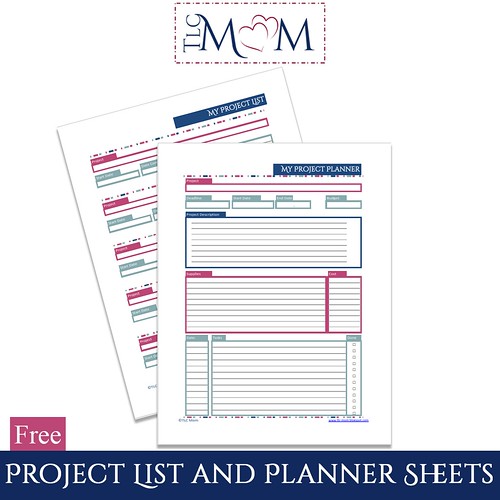
I think I re-did both of these designs at least 5 times. But I'm really happy with how these came out! If you have any suggestions about these sheets please send me a note or add a comment here. I'm looking forward to hearing how you used these.

At a later date I'll be adding a download page where you can find all of these goodies.

-----------------
If you have a moment and found this post helpful, please click the following banner to vote for our blog. All you need to do is click the banner and it puts in a vote. No sign up required. Thank you!!!
If you like what you just read please click to send a quick vote for me on Top Mommy Blogs- The best mommy blog directory featuring top mom bloggers
Reading Time:

Friday, February 21, 2014

Nap Time Crafts: Vol #3 - Reusable Work sheets
4:31 PM0 Comments
While my Daughter is a bit away from doing anything like this I still wanted to make up a few for my nephews who would find something like this useful.

I always love the workbooks you can get for you kids, but I often disliked how once you were done with using the lesson it was written on and you couldn't revisit it unless you copied the page prior to using. Remember the Laminator I purchased the other day? Well I got thinking instead of either loosing out on old lessons and or having to print out more pages, why not find a way to make them reusable? It hit me that I could use the Laminating sheets and laminate some work pages (I put 2 in per pouch so that you have front to back usage)  Then use a dry erase marker for marking the pages and then erasing after use.

While I realize this is great in theory this could also be an epic fail with anything marker and kids. So that bit I'm going to have to figure out. But in a 4 and 5 year old they know a bit better what is okay and what isn't (let a girl dream okay). So that I'm not worried about. I'm also planning on laminating some free baby sign cards again double sided for better use of the laminating pouches.

I also was able to laminate a few free educational games that I'm going to have on had to take with us. I'm really excited about being able to do things like this and have them on hand for trips and educational activities that don't require the usage of a tablet or phone. But also allows us to be included in on the fun.

What you need:
- laminator (you can get some for as low as $20. Mine I got for around $40 but all the projects I can do with this will end up paying for itself very quickly. Also very very nice to use with scrapbooking or for keepsakes like foot and hand prints done on paper/cardstock or Christmas ornaments.)
- laminating pouches (whatever size your project is)
- Printed free work sheets. There's many available on the internet for personal use.

Laminator, lamination pouches and my work sheets

Reading Time:

Friday, February 7, 2014

Nap time Crafts - 1st edition
8:44 AM 2 Comments
This past weekend I decided to make some leg warmers. This inspiration came from buying a few that were free but had to pay shipping. After looking at them I realized "Amanda you really could have made these yourself for less than what you paid for shipping." Doh! Oh well, sometimes it's okay to pay for convince when you have a child.

But the creative bug in me just really wanted to feel accomplished in making something. So I set out and grabbed a few different tutorials then just winged it from there. Most of them were the same where you take knee high socks and cut the foot part off (I bought my knee highs at Target, they have a great selection of patterns and I only paid $2.50 per pair). Then where the rest of the foot is (not the leg part) you cut that straight piece of fabric. Then you're left with something like this. That little bit of fabric you cut from the foot will become your foot cuff. I trimmed mine down so that it would hug her ankle just a little.
this is what your left with, after everything is cut
Anastasia modeling a pair


Then I sewed the cuff on. (harder than I realized as the tube shape was too small to slip on my machine. So a lot of fabric working was done. There was probably an easier way to sew it (like a thread and needle) but I made due :) The nice thing about this craft is you can really do it if you don't have a sewing machine at all.

Overall I loved how they turned out. Anastasia has worn them a few times and doesn't seem to have an issue. She has some room to grow into them.The convenience of these are really nice. Sometimes I really don't want to use leggings on her as I find the bands can sometimes be to tight around her belly. So I can slip these on her without worrying. Also what's really nice is I can slide these on under her on piece dresses (the ones with the onesies attached) and the look so cute.

Anastasia bundled up after another frigid week


Reading Time: